
Thursday, June 30, 2011
Chalks
Wednesday, June 29, 2011
New card

Tuesday, June 28, 2011
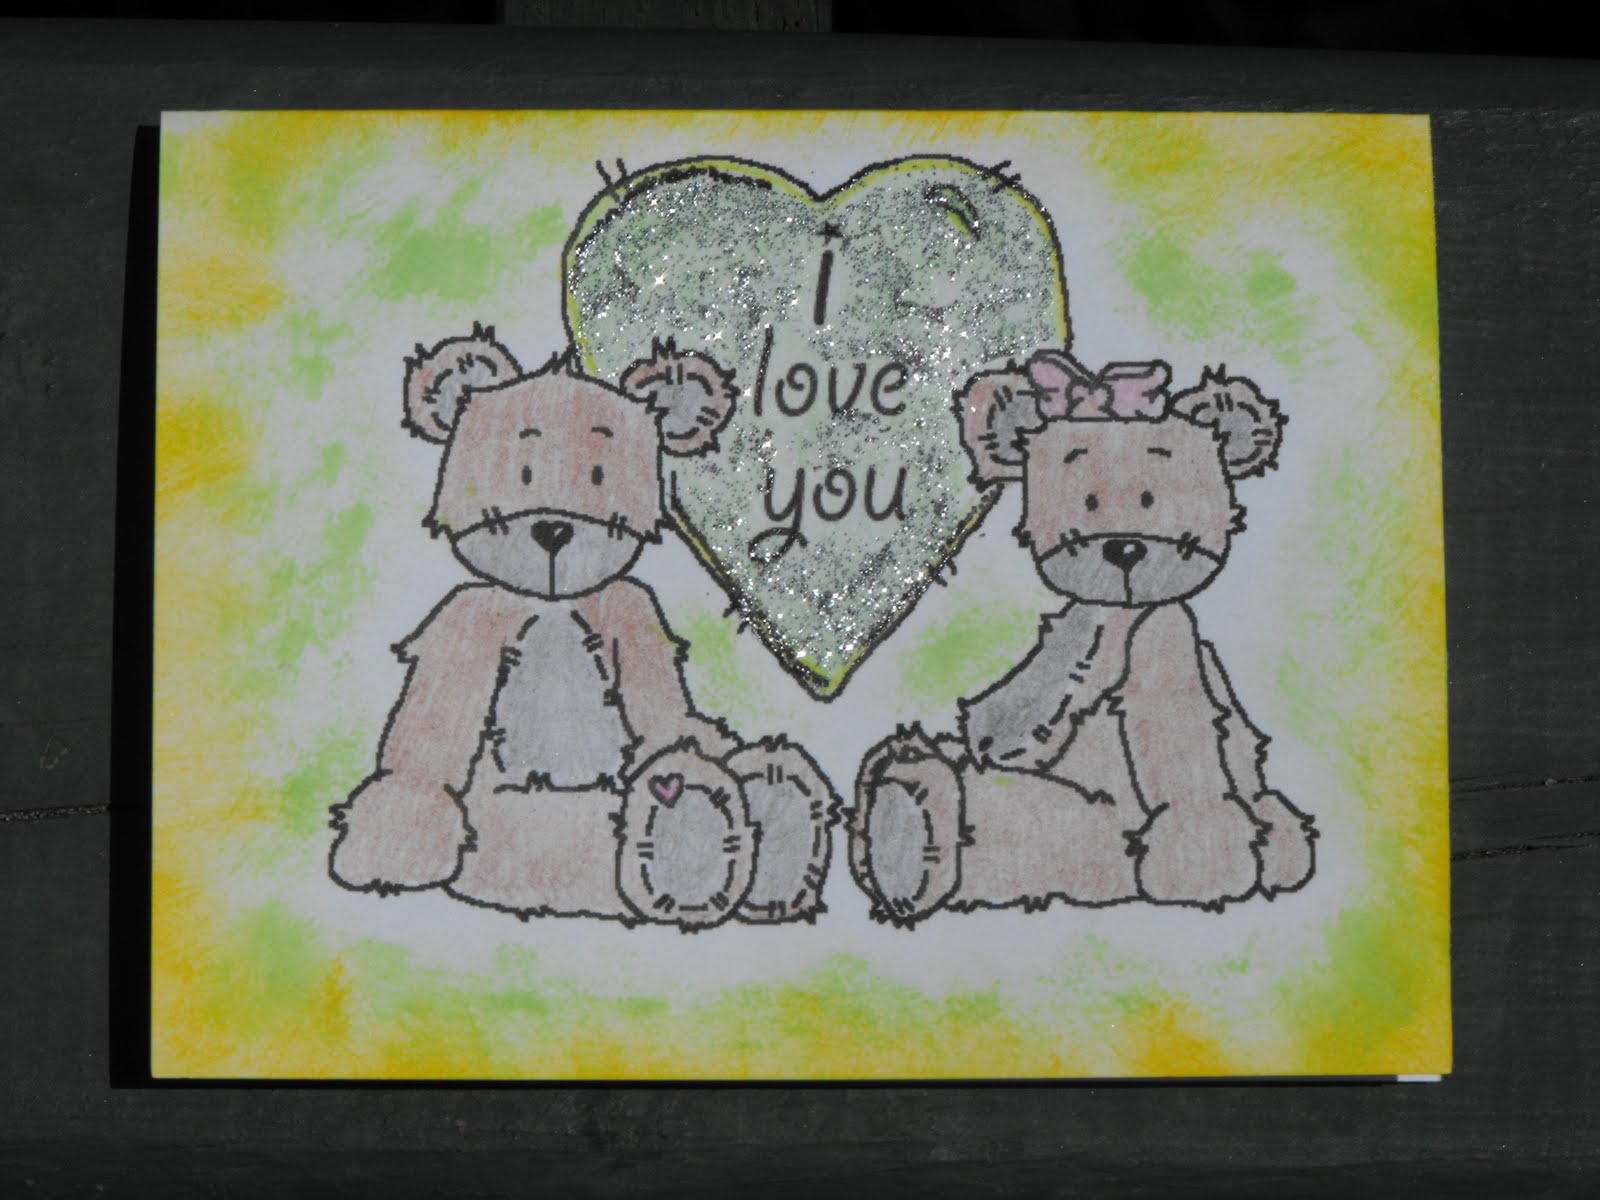
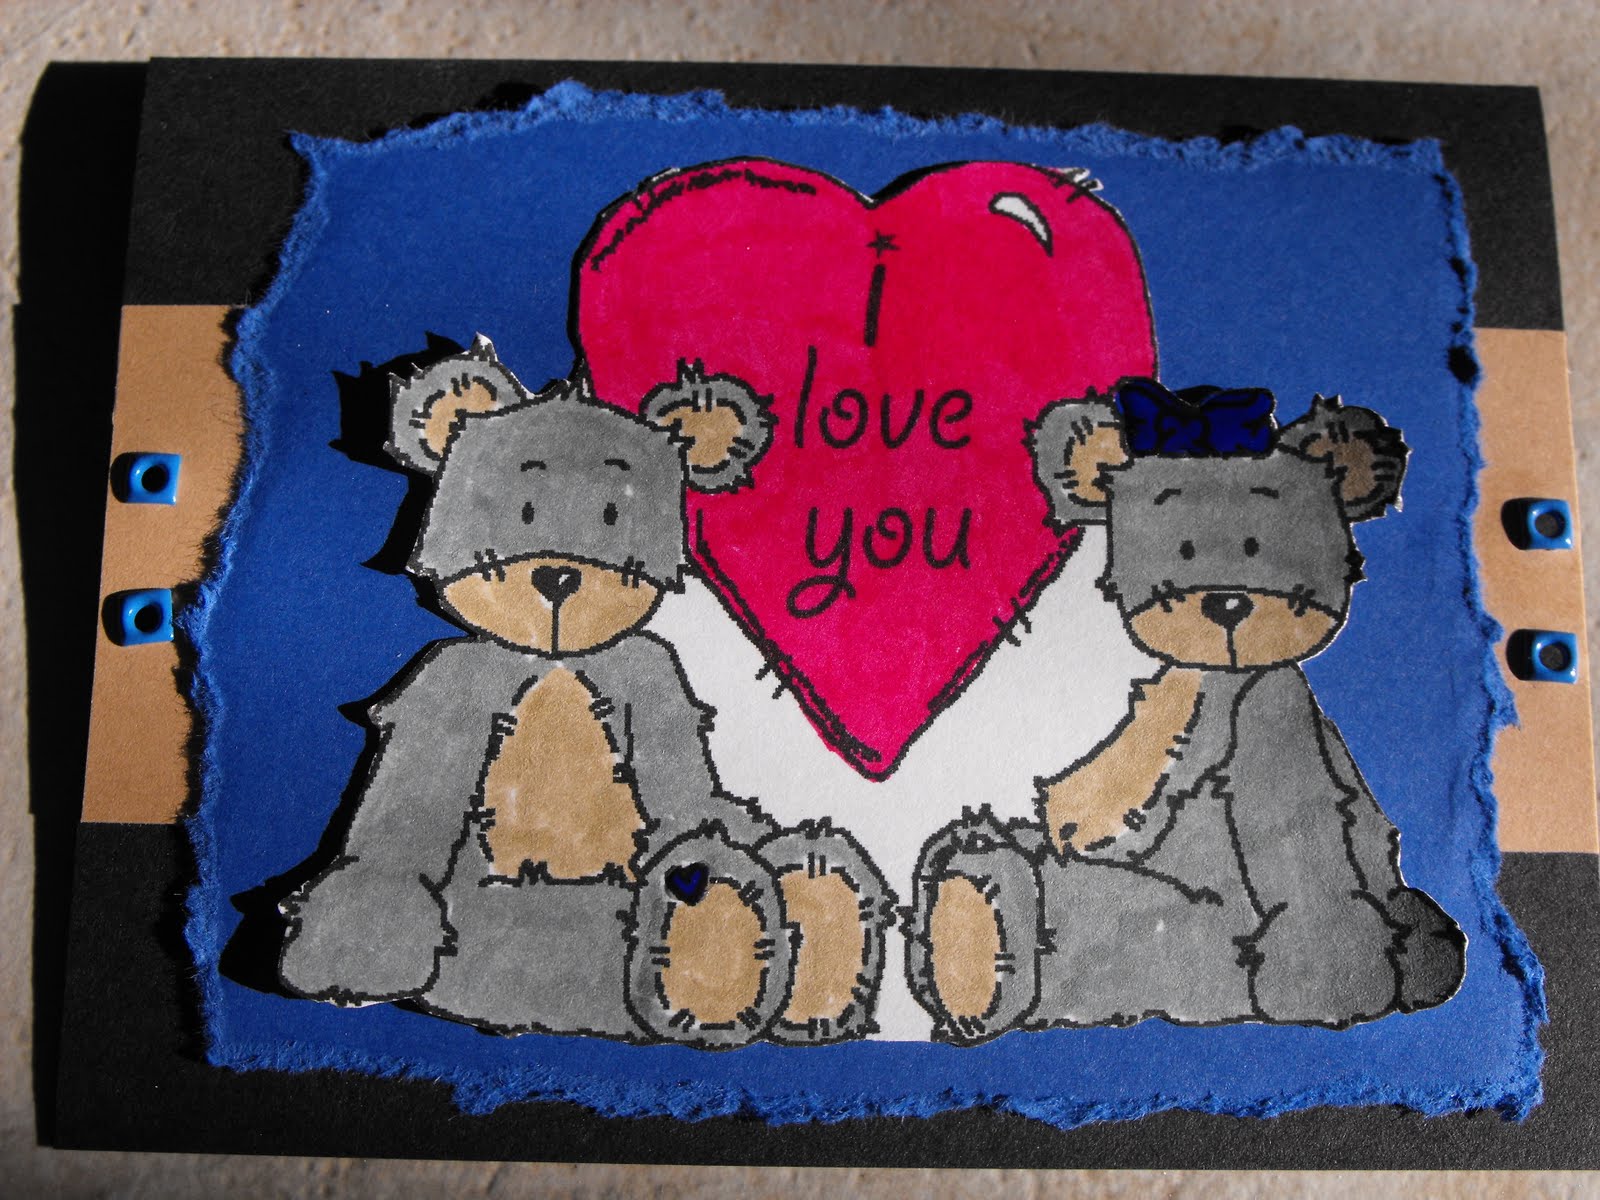
Digital Stamp
Monday, June 27, 2011
Valentines Day Card
Sunday, June 26, 2011
Thank You Card

Saturday, June 25, 2011
New Card


Monday, June 20, 2011
Digital Downloads
I hope that everyone had a great weekend. Well, I have been doing a lot of blog hopping lately and have seen a lot of cards and ideas using digital images. I am not sure what this is all about so I decided do dig a little deeper and try it out myself. I just bought a digital download. Yah!! I have not yet received it and I am not quite sure what I am going to do with it once I get it but I am really excited to try something new and hoping to get a handle on what its all about. So if anyone has anything helpful I would appreciate any advice about these downloads. Like I said in a previous blog that I have been stamping for about 9 years. The last 3 years or so I did the bare minimum. Would make cards when I needed them, but I did not keep up on the latest trends and the new tools. I had not boughten anything new except my Cricut. There have been lots of changes. So now that I have dedicated myself to making cards on a regular basis and keeping this blog I feel like I have to try and keep up on the different and new things that are out there or at least try them. The next thing I have to look into is Copics. I know that they are colors or coloring tools of some sort. I have seen and read that a lot of people are using these and I have seen many awesome handmade cards that they used them on. Well I am patiently waiting for my digital download , I guess I’ll have to make something else till then. Have a great day!
Sunday, June 19, 2011
New Card


One of my favorite colors is pink. I’ve seen some really great cards out there lately with pink and I thought yup now its my turn. I used my Cricut with this one. I love these flowers. They are really cute and so easy to make cards with. As you can see I did two variations of the same card. I just changed one color and rearranged the images. I think my favorite is the pinks with the black. I guess I really like black too!! The flowers were made with the Cricut cartridge Home Décor. The flowers are a variety of different sizes. It is the same flower though. The Birthday Wishes stamp is from a Stampin Up set called So Happy For You. The little pink jewel things are called Glass Effects by Heidi Grace Designs. The different shades of pink are Regal Rose and Pretty in Pink from Stampin Up. The black card looks great as is, so when I used the white cardstock I thought it looked a little plain . So I took a cotton ball and dabbed Regal Rose ink on the whole front to add some color. It made a huge difference. As you can see the then layered some paper under the birthday wishes. I love to tear!! Always love to hear feedback on my ideas and handmade cards. Have a great night.
Saturday, June 18, 2011
New Card

Friday, June 17, 2011
Styles
First of all I hope that everyone had a great day. Mine was pretty prosperous. Had a great day of shopping with my sister-in-law. Got the whole lawn cut and trimmed and even had time to sit down and make some cards. Well I have been looking at many card making idea blogs over the last couple weeks. It is so neat because there are never two cards the same. I have learned just by looking at many blogs that each person has their own style and way of doing things. Let me tell you there are a lot of great handmade card makers out there. Also I have learned that there is always something new to learn. When I am looking at someones step by step instructions on a card and I come across something I have not heard of before I have to write it down so I can go back later and find out what it is they are talking about. Making handmade cards has changed and keeps on changing. I definitely think that its all the new gadgets they come out with.. If you throw in a Cricut or a Cuttlebug , you’re on a whole new level. I really enjoy going to different blogs and seeing so many great ideas. There are many that are so detailed. My cards are not there yet. I hope at some point I can get to that level. My style right now (I think that your style does change from time to time) is pretty simple but I think that my cards are cute.. I just enjoy making cards and trying to come up with new ideas. I hope you’ll come back to see how my cards are coming along. Good night all!!
Thursday, June 16, 2011
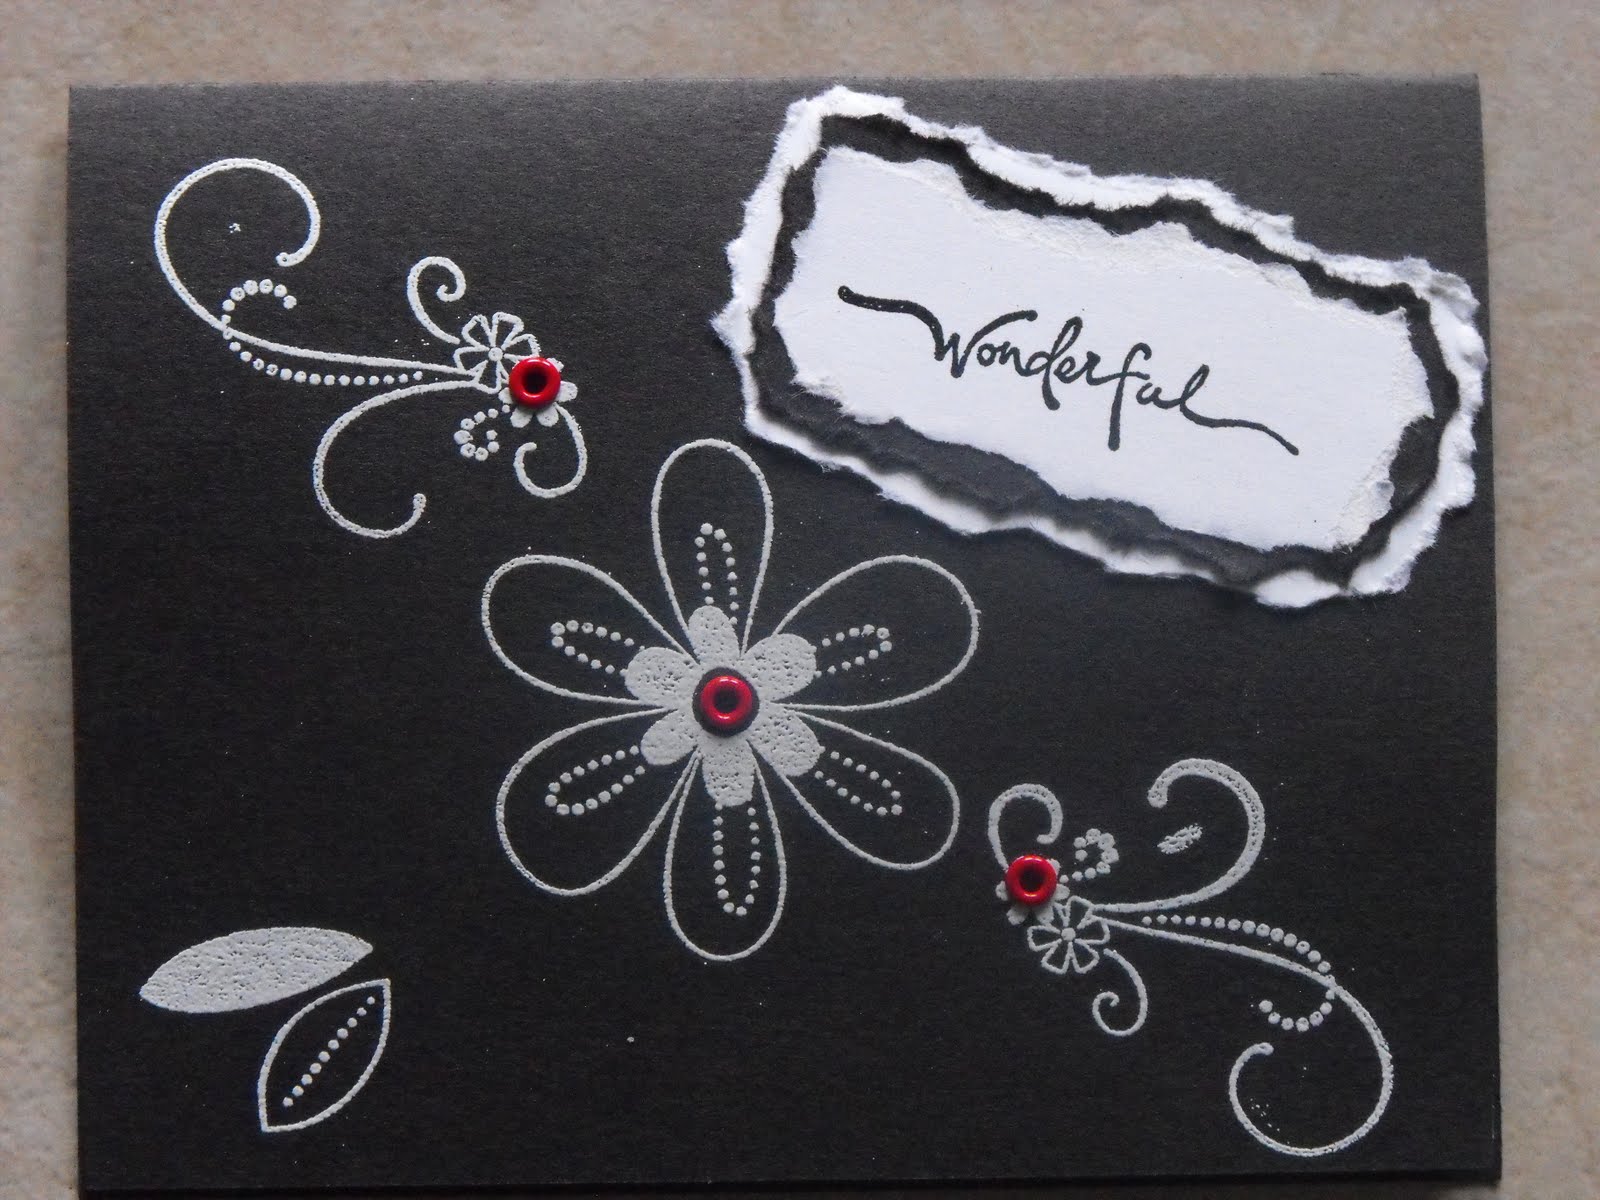
Universal Card
This blog has been a great thing for me. I have a ton of stuff for making cards but was not using any of it. By doing this blog it has motivated me to make cards again. My goal is to write or post a handmade card every day for the first month. Now its like any free time I have I am in my back room trying to come up with some new ideas or cards. The funny thing is that I forgot how much fun it was. I feel really good and accomplished when I have made something.
I think universal cards are great so I’ve made another one. I was looking through my stuff and came across my embossing things. I knew I had to make a card using it. I love how embossing looks. It gives the card texture. I started out with black cardstock from the craft store. I then took my Versa Mark from Stampin Up and stamped the flower, pedal, and swirls. Next I poured my white stampin powder on my stamped images. Once all the excess powder is removed you heat up the embossing powder that is left on your images with an embossing tool. I then used Real Red eyelets to give it a little color. For the wonderful I used white cardstock . I stamped the word with my Versa Mark and used Basic Black embossing powder. I then tore around the wonderful and added a couple of black and white layers . The wonderful is from the set Warm Words and the rest of the stamps is from the set Friendship Blooms. Both are from Stampin Up.
I hope you are enjoying my handmade cards and ideas. Like I said I am going to try and post something every day for a month so come and check back each day to see what I have. Have a great day!!
Wednesday, June 15, 2011
Fathers Day Card

Well this has been the third time I’ve tried to sit down and make my fathers day card. The other times I started my card, the ideas I came up with stunk so I gave up. Since its only 4 days away I thought I would give it another try. I do not think that this handmade hard is horrible but I am not feeling so great about it either. I think the card is kinda cute but plain, it needs something more. So if any of you have suggestions I would love to hear them. I did use my Cricut Machine for this one. First I took Basic Black ink from
Stampin up with a cotton ball and just kinda brushed a little color on the front of the card. I then used the Plantin Schoolbook cartridge to print the Happy Fathers Day. Next, I took my Four Legged Friends Cartridge and printed out the fish. This was actually the first time I used this one. I had never done the printing in layers thing before. I thought it would be much more complicated than it was. Very cool. I used black cardstock from the craft store. The gray is Going Gray which is a Stampin Up color. Like I said I thought it was kind of plain so I added some glitter glue to parts of the fish. Any feedback or help is welcome.
Tuesday, June 14, 2011
Handmade Card
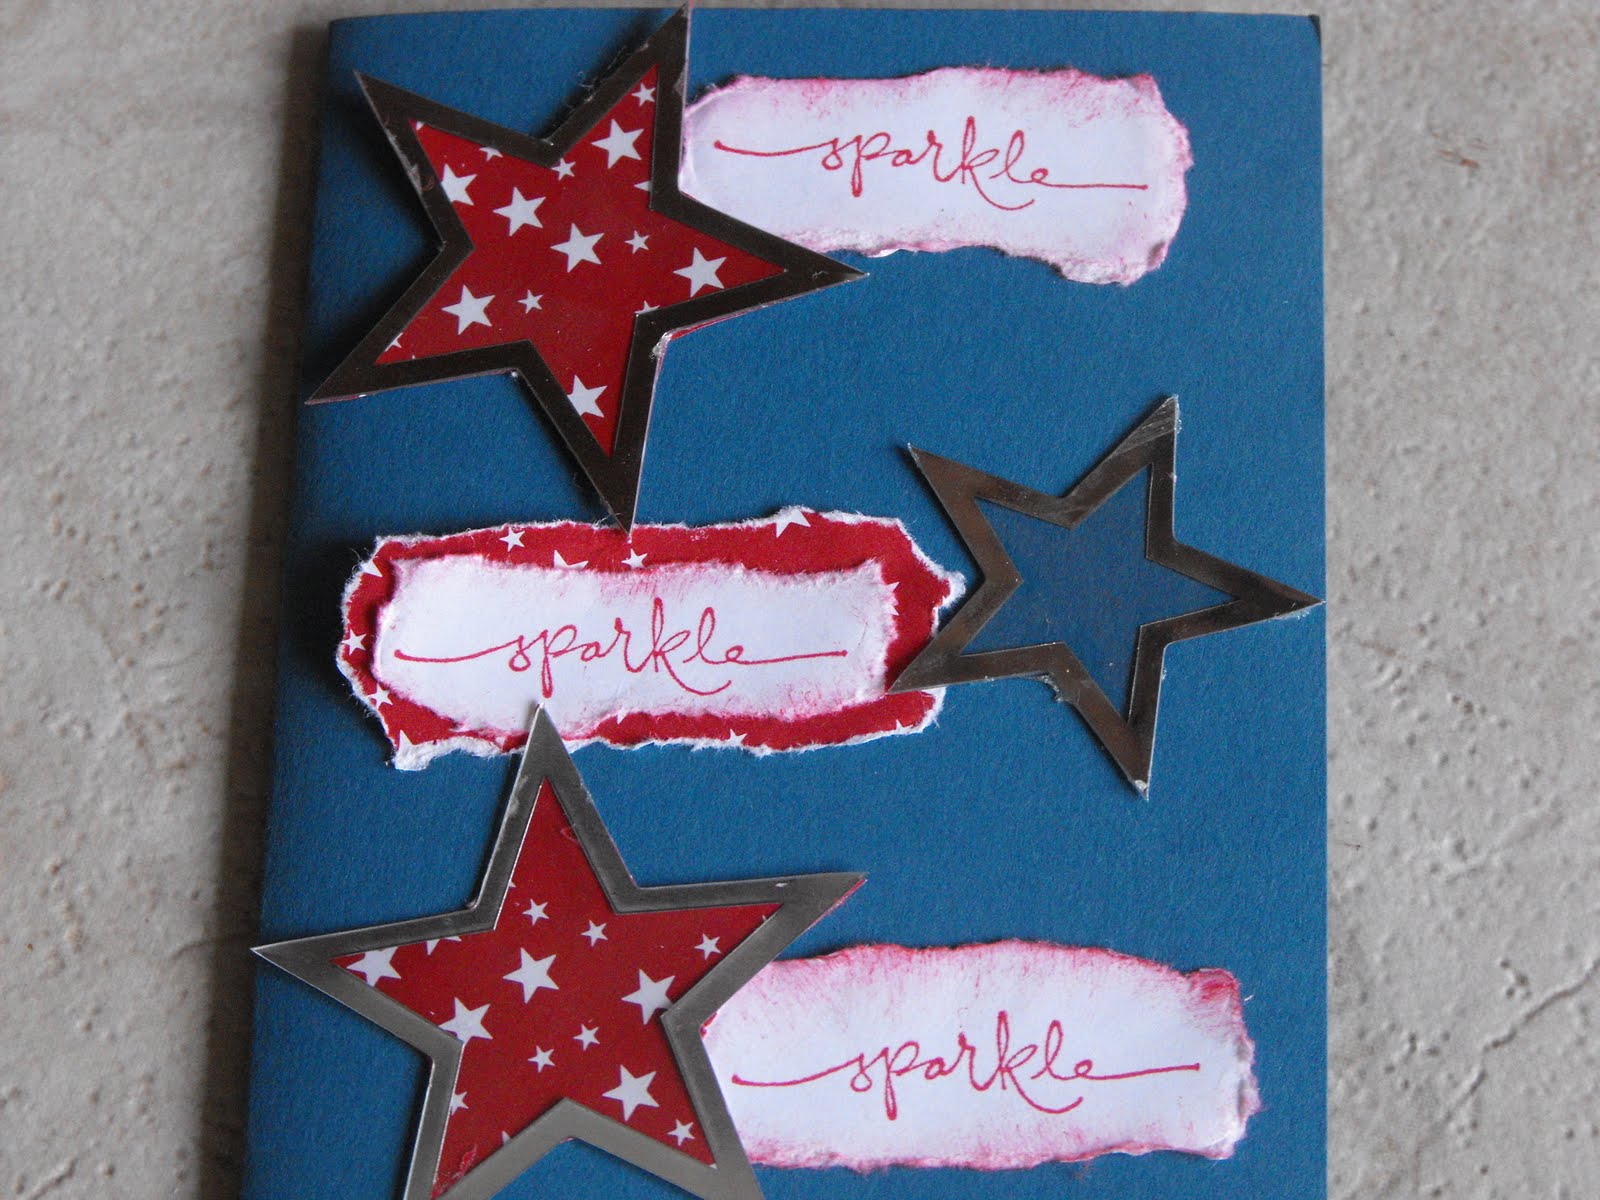
Well as I sat down today to make a card I came across these stars I purchased from a garage sale a couple weeks ago and I thought these are really cool, so I had to make a card using them . The stars made me think of the 4th of July so I then had to dig out some paper with stars on them. That is how I got started with the idea for this handmade card. The stars are very cool. They are called Foil Rimmed Acetate Shapes made by Li’l Davis Designs. I’m not sure where you can get these, like I said I got them at a garage sale. The star paper was just from a variety pack I had bought at Joanne Fabrics. All I did was glue the star paper to the back of two of the stars, the other star I left as is. I picked out the Ruby Red ink. I then dug my color coach out and looked at which shades of blue went with Ruby Red . Not Quite Navy was the answer it gave me . I then stamped the word sparkle. It is from the Stampin Up set called From Warm Words . Then I tore around the word sparkle and with a cotton ball rubbed the edges with the Ruby Red ink. I also placed the stars paper around the middle sparkle. I then placed it all together. So you could write or stamp anything you want in the inside to make it for whatever occasion you want.
Monday, June 13, 2011
My Favorite Products
I want to tell you about my favorite products that I use for making handmade cards. I know that everyone has there own favorite something. Mine is Stampin Up stuff. I love the paper ,the ink pads, the eyelets, the brads, the markers, the embossing powder, the chalks, the wire and any other colored things.(I’m sure that I’ve missed something.) I love the products but it has more to do with just the colors of all these things. I find that sometimes I sit down and just look at the different colors of paper and find a couple that I think go together and try some ideas. If I’m not sure about it or I don’t think the colors are just right I’ll get out the Stampin Up Color Coach. This is the greatest thing. It costs $14.95 but its so worth the money. For those of you who are not familiar with this, it’s a handy tool to have . Find the color you want to use and the wheel will give you coordinating and complementary colors to go with your color. It also gives you dynamic duos. This wheel is very helpful. It puts together colors that I would have never dreamed of and they look excellent together. I just love that all their colors match. Sometimes I think that is half the battle. Once I get my colored paper picked out then I’ll look which eyelets match or do I have that color embossing powder . Its also really nice to have the same color paper and ink. You can’t go wrong there. I would love to hear about any of your favorite product!!
Sunday, June 12, 2011
Universal Card

Saturday, June 11, 2011
Creativity and Ideas
Hey everyone I hope the day is going well . Here I am trying to create some masterpieces for cards. I am just curious but am wondering how this works for you guys. I can sit down and have what I think are some great ideas in my head . So I get started and I am stamping or layering, cutting or whatever my idea involves and I end up with this hideous homemade card. So I then make some changes. I try different colors or I change the card around maybe add a layer of something or take one away and I come up with something even worse. So I try yet again to make some more changes. This time I will turn the card and have it open the opposite direction. I might now try and add some embellishments eyelets, brads , wire, or something and it gets even worse. So if this happens to me it is time to quit for the day. I should run far away from my stamping room. I can then come back the next day with no ideas in mind and just start trying different things and I come up with this really cool card. So like I said does this happen to everyone or just me? Do some days you have creativity and some days you don’t? Where do you get your ideas or inspiration from? Would love some feedback.
Friday, June 10, 2011
Handmade Cards Ideas


 Handmade Cards Ideas
Well I just made some more handmade cards last night. I’m so excited. I have 3 parties coming this weekend so I wanted to make a card that I could use for all 3. So as you can see the cards or the ideas are pretty much the same but there are a few little differences between the birthday and the graduation cards. My favorite thing about these cards it the personalization. I have never done this before. I thought that it was a real nice touch.
The first one is the birthday card. I think pink is so cute. (I only have boys so I use the pink whenever I get the chance.) . I used my Cricut and some stamps. The letters are from the Plantin SchoolBook Cartridge, the flowers are from the Home Décor cartridge. The letter are 2 ¼ inches big. The big flower is the same size but the little ones I changed and just made a variety of sizes. The Happy Birthday stamp is from the Stampin Up set called Favorite greetings. As you can see I love to tear which I did around the happy birthday just to add a little something. All of the paper and inks are from Stampin up. The pink the card is made from and the stamp is the color Pink Passion. The other shades are Stampin Up too but not sure which ones they are.
The other 2 are graduation cards. I m not sure how this happened but I do not have a stamp with the word graduation in it so I found a saying that I thought was appropriate. It says May all your wishes come true. It is from a Stampin Up set called Heard from the Heart. I did flip flop the cards to make them a little different. The colors of Lily’s card is Night of Navy and Ballet Blue. Jen’s card is made from the colors Mellow Moss and Bliss Blue. All Stampin Up colors. The letters and the flowers are all the same sizes as the birthday card.
So as you can see by just making the slightest changes you can make handmade cards for different occasions at the same time. I hope you enjoyed these card ideas.
Thursday, June 9, 2011
Organization
Organization and having your own space to work is the key to making great cards. Last night I rearranged my spare room to organize all of my stamping and card making things. I used to have to take everything out to make cards. Then when I was finished I would pack everything back up and have to put it all away. I know by having to do it this way I did not make cards near as much as I wanted had wanted to. It takes a lot of work and was tiring to get it all out and have to put it away in the same sitting. I would think is it even worth it? It is also very time consuming digging through all my bins to find that certain stamp set or those specific colored eyelets or whatever you were looking for. There were times where I had some great ideas but I wanted something specific, by the time I found what I was looking for the ideas or the inspiration I had was gone. So I really thing that organization is important. I am so looking forward to sitting down and getting in some serious handmade card making . It was great I went through all of my stuff and I found things that I forgot I even had. It was just like shopping! Now that I have everything all in order , I hope to be stamping and making cards like crazy so I can share with you some of my ideas, techniques, favorite things, and just some handmade cards with you. I would love any feedback and can’t wait to hear from you.
Monday, June 6, 2011
Handmade Cards Ideas
Hey everyone my name is Mik and I started making homemade cards about 9 years ago.. I love to make my own cards and I want to share some cards, ideas, and different techniques (or styles), and just some of my favorite products with you. Maybe since this is my first post I will tell you a story about myself so you can get to know me a little. I am very cheap when it comes to buying cards (I have not bought a card from a store in many, many years) from the store. I would go and pick the cheapest one I could find. I didn't really care what it looked like. Now when myself or someone in my family recieves a store bought card for whatever occasion I have to look at the back and see how much it cost. I'm like I can't believe they spent $5.00 on this. I could have made a much better card than this. Then I laugh because I will spare no expense when it comes to buying a new tool, cool paper, or whatever it is I see and want for my card ideas. Oh well what's a girl to do?? I know firsthand that you can never have too much card making stuff. (Don't ask my husband about that.)
 The first handmade card idea was inspired by the next holiday, 4th of July . As you can see it is a pretty simple card. The technique for this idea was tearing or ripping the paper. I thought what a cute idea tearing the paper to look something similar to the flag. I then stamped the blue and red stars and tore around them also followed by the word celebrate. This card really could be used for any number of occasions around the 4th. For this handmade card I used all Stampin Up supplies. The paper colors are Real Red and Brilliant Blue as well as the stamp pad colors. The stars are from the set Scribbles and the word celebrate is from the Wonderful Words set. I hope this card will give you some new ideas of your own.

Subscribe to:
Posts (Atom)